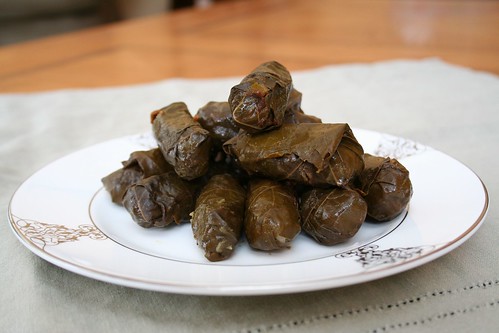
This is the recipe that inspired this blog.
You see, when I was a brand-new baby bride (the new harse), unschooled in the ways of crafting the dishes that were becoming my comfort food, Auntie Seta came over to our Burbank apartment, walked me to the Armenian grocery store on the corner and guided me through an introduction to the mysteriously labeled products with which I needed to become familiar (What's a Tukas? It's a brand of tomato paste, Dear.).
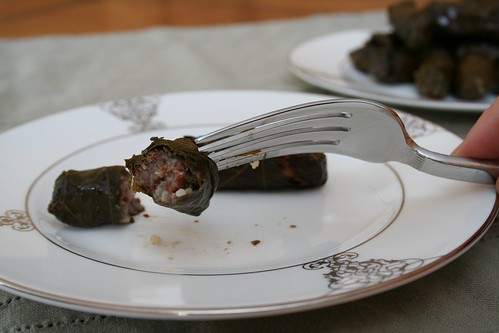
Together we whipped up a batch of the most drippingly luscious dolma I'd ever been blessed to eat. Ok, it took 3 hours, it was hardly 'whipping'. And it made enough to freeze and enjoy for 4 months. Quite a batch! But that day I understood 3 very important things:
1. Not everyone is fortunate enough to have an auntie who may or may not have time to spare, but who lovingly makes time for you.
2. It's important for people to know their food (particularly brides married to delicious American-Arab-Armenian super-studs).
3. I could fill the void in the internet where step-by-step dolma instructions belong. By now this has surely been done famously by lots of knowledgeable people, but this is a sentimental recipe: it was my first mysterious Middle Eastern dish, and I'm so happy to finally share it today, with gracious permission from Auntie Seta Thomasian!
Ingredients
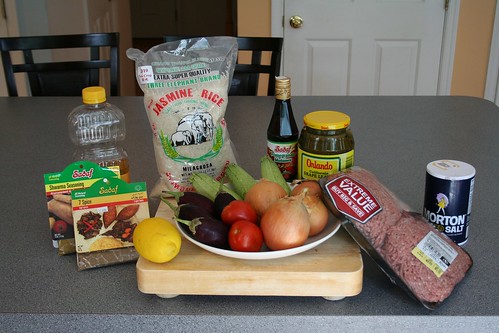
Make the filling
4 lbs. ground beef (20-22% fat)
4 cups jasmine or basmati rice, rinsed
4 tsp. salt
4 tsp. shwarma seasoning*
4 tsp. 7 spice*
*Can be purchased in international markets. A brand I commonly use is Sadaf. You can certainly add more of the spice blends if you prefer, but the amounts above are a good place to start.

Prepare the vegetables to stuff, fill and roll
1-2 16 oz. jars grape leaves (depending on how many other vegetables you fill)
5 yellow onions
Any combination of the following:
4 finger-length eggplant
4 finger-length squash
4 mini sweet peppers
4 roma tomatoes

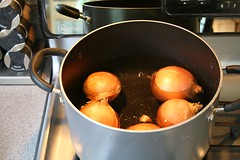
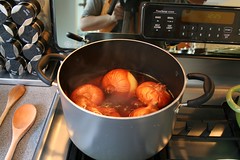
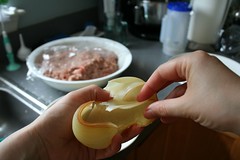
Slice the onions from one side to the core, but not beyond. You'll wrap the onion layers around filling later. Boil the onions over high heat until they're tender but not mushy, checking every 4-5 minutes until they're ready. Drain them completely and allow them to cool before attempting to fill them.

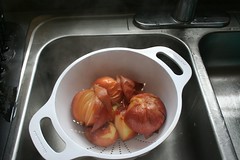
Slice off and reserve the tops of the eggplant, squash and tomatoes. You'll replace the little hats before cooking. Core the veggies with a paring knife and/or spoon, leaving about a 1/4 inch or less of the outermost layer. Reserve the innards because they're really good food! Sautee them up with some spices and any leftover meat you may have...delicious! Stuff the veggies with filling (see below for grape leaf tutorial).
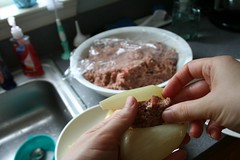
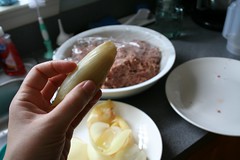

Pour 2 Tbsp. corn oil in the bottom of each pan. Layer the stuffed vegetables into the pans. The bottom layer of vegetables in the pan should be onions, because the direct heat will caramelize the skins. The onions are less prone to scorching than the other veggies.
The next layer should be any peppers, squash or eggplants you may have filled.
The top layers should be filled grape leaves, arranged in concentric circles.
Actually, the tippy top layer should be tomatoes if you are using them, because they are the most delicate.
Place two plates on top of the stuffed veggies and grape leaves. The pressure from the weight of the plates will prevent the leaves from unravelling as the dolma boils.
Make the sauce
1 cup lemon juice
1/2 cup pomegranate molasses (more to taste)
2 Tbsp. tomato paste (more to taste)
2 tsp. salt
Barely cover with water, lemon juice, pomegranate molasses. Bring to a rolling boil, reduce heat and remove plates. Add water if needed. Re-boil.
Taste, adjust for salt and pomegranate molasses.
Keeping the water level high enough to thoroughly cook the rice but low enough so that when you're done, you have a nice reduced sauce and not a soupy mess is a bit of a dance. Keep your eye on the water level.
Tips for grape leaves:
The jarred grape leaves should be thoroughly rinsed before use.
If a leaf is too large, just slice it in two pieces...waste not, want not.
Slice off the woody stems before rolling as they're not pleasant to bite into.
Roll them somewhat loosely as the rice in the filling will expand while cooking.
Smaller rolls are considered daintier and most fit for company. On the other hand, life is short and you are likely busy...so if you want to save time and make larger rolls, I won't judge!
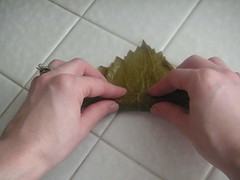
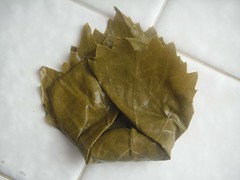
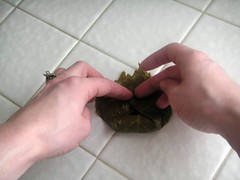
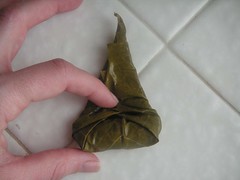
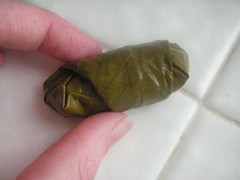
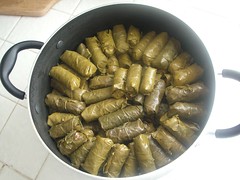
Friends, the brands here are the ones we like. Please use what you like and have access to; don't get hung up if you can't get the brands I've listed here. I can't even get them all the time, depending on where I live, but the last thing we want to do is not make this dolma! Remember: everyone who cooks has the right to do so according to their family's taste!

 Soak rice overnight to achieve the proper consistency.
 Drain the rice.
 Transfer soaked rice to a food processor. Note to Self: I want a new food processor for Christmas next year. Essence of electrical burning is not my idea of a pleasin' kitchen aroma.
 Add salt and pepper. It's important to do this often as you add more ingredients, to ensure a proper balance between rice, meat, salt, and spice.
 Run the food processor until the rice becomes somewhat granular.
 While still running the food processor, start adding beef, a handful at a time. For the shell, we have used lean ground beef. Why lean? It's preferable to more fatty varieties because it helps ensure that the shell holds its shape while it's being boiled. Fat acts more as a tenderizer/lubricant than a glue here. You need a little, but too much in the outer shell raises the chances of the kibbe disintegrating while they boil. After all this work, you're going to be sad (and maybe mad) if things fall apart. Since food should make you happy, be picky about your beef.
  Handful by handful, keep adding ground beef, keeping an eye on the coloring. You want a nice pink (not red) mix.
 The goal is to have a thick, sticky but workable mixture, so add a little water if it seems like it's dry and grainy vs. sticky.
 You're done when the color is like this. I've given quantity guidelines in the ingredients here, but next time I make kubba I'll carefully measure so I can make a more exact recommendation on the proportion of rice to meat, for those of us who like things to be precise and measured.
 For the filling, use 80-85% lean beef. A fattier grade of ground beef is needed for the filling because it should have a marked contrast in color, flavor, and texture from the shell. In the words of my father-in-law, the filling should be "fluffy." In a beefy sort of way.
  This shows the contrast in color between the shell and the filling.
  Have a bowl of ice water nearby to wet your hands if they get too sticky to work with, which they invariably do.
  With your thumb or finger, poke a hole in the ball and then pinch the sides until you've transformed your ball into a bowl (remember ceramics class?).
 Now pinch a glob of filling and deposit it into your nice little bowl. The blob of meat should be almost (but not quite) as big as the original shell glob, ensuring that there will be enough filling to flavor the kubba without making it impossible to close the shell around the filling.
 Now fold the sides of the shell over to encapsulate the filling. This may take some practice, but believe me, you'll get the hang of it if you stick with it (get it? stick? 'cause it's...never mind.)
 Get all those edges folded over the top and smooth them down a little.
 Next, between your hands, gently press the little ball until it's somewhat on the flat side...think flying saucer.
 Now you're done! And isn't it cute. Now just repeat this about a hundred times. HA! No really...do it. And think of what a domestic diva you're becoming. And about how happy that man of yours is gonna be when he sinks his teeth into one of these. And about how you only have to do this a couple of times a year if you play your cards right, because these babies freeze like a charm. You don't even have to defrost them before plopping them into the sauce when cooking time rolls around.
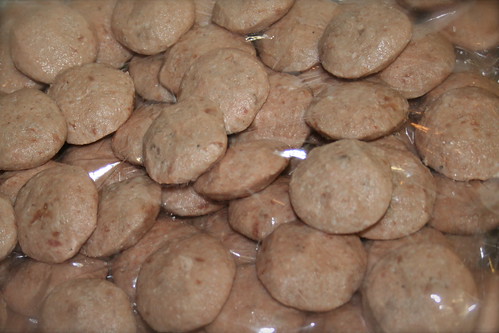
 Layer the kibbe on plastic wrap (I haven't tried parchment paper, but I wonder if that would work, considering these are going in the freezer?), being sure they aren't touching. Since they're kinda flat anyhow, don't worry about laying them on top of each other. No harm done if they get a little flatter.
 When all the outer shell is gone, you're done! Finito! Hallas! Now if you have a sauce prepared, plop however many kubba you want into the pot and boil until they float to the top. Cooking time varies depending on the size of your kubba, but when they rise to the top, try one...it's probably done. Meanwhile, put the rest into the freezer. Once they've hardened, transfer them into a dated ziplock bag and pull them out as needed.